
Final Cut Pro can remove generated files and exclude completely unused clips from a copied project. If the timeline uses any part of a clip, however, Final Cut Pro keeps the entire source file. ArchiveCut can create an archive containing only the parts used in the edit.
Remove generated files and unused clips
For generated files, select the project, event, or library and choose File > Delete Generated Library Files. This removes render files, optimized media, and proxy media created by Final Cut Pro.
To exclude completely unused clips, select the finished project and choose File > Copy Project to Library > New Library. Final Cut Pro copies the clips used in that project and leaves unrelated clips behind.
Delete unused sections from source clips
When copying a project to a new library, Final Cut Pro copies the entire source file for every clip used in the timeline. If the timeline uses 30 seconds from a one-hour file, the archive still contains the full one-hour file.
To keep only the used ranges, create a trimmed archive with ArchiveCut:
- Export the finished project, event, or library as Final Cut Pro XML.
- Open the XML in ArchiveCut and review the used ranges and estimated savings.
- Choose how much extra media to keep as handles.
- Create the archive.
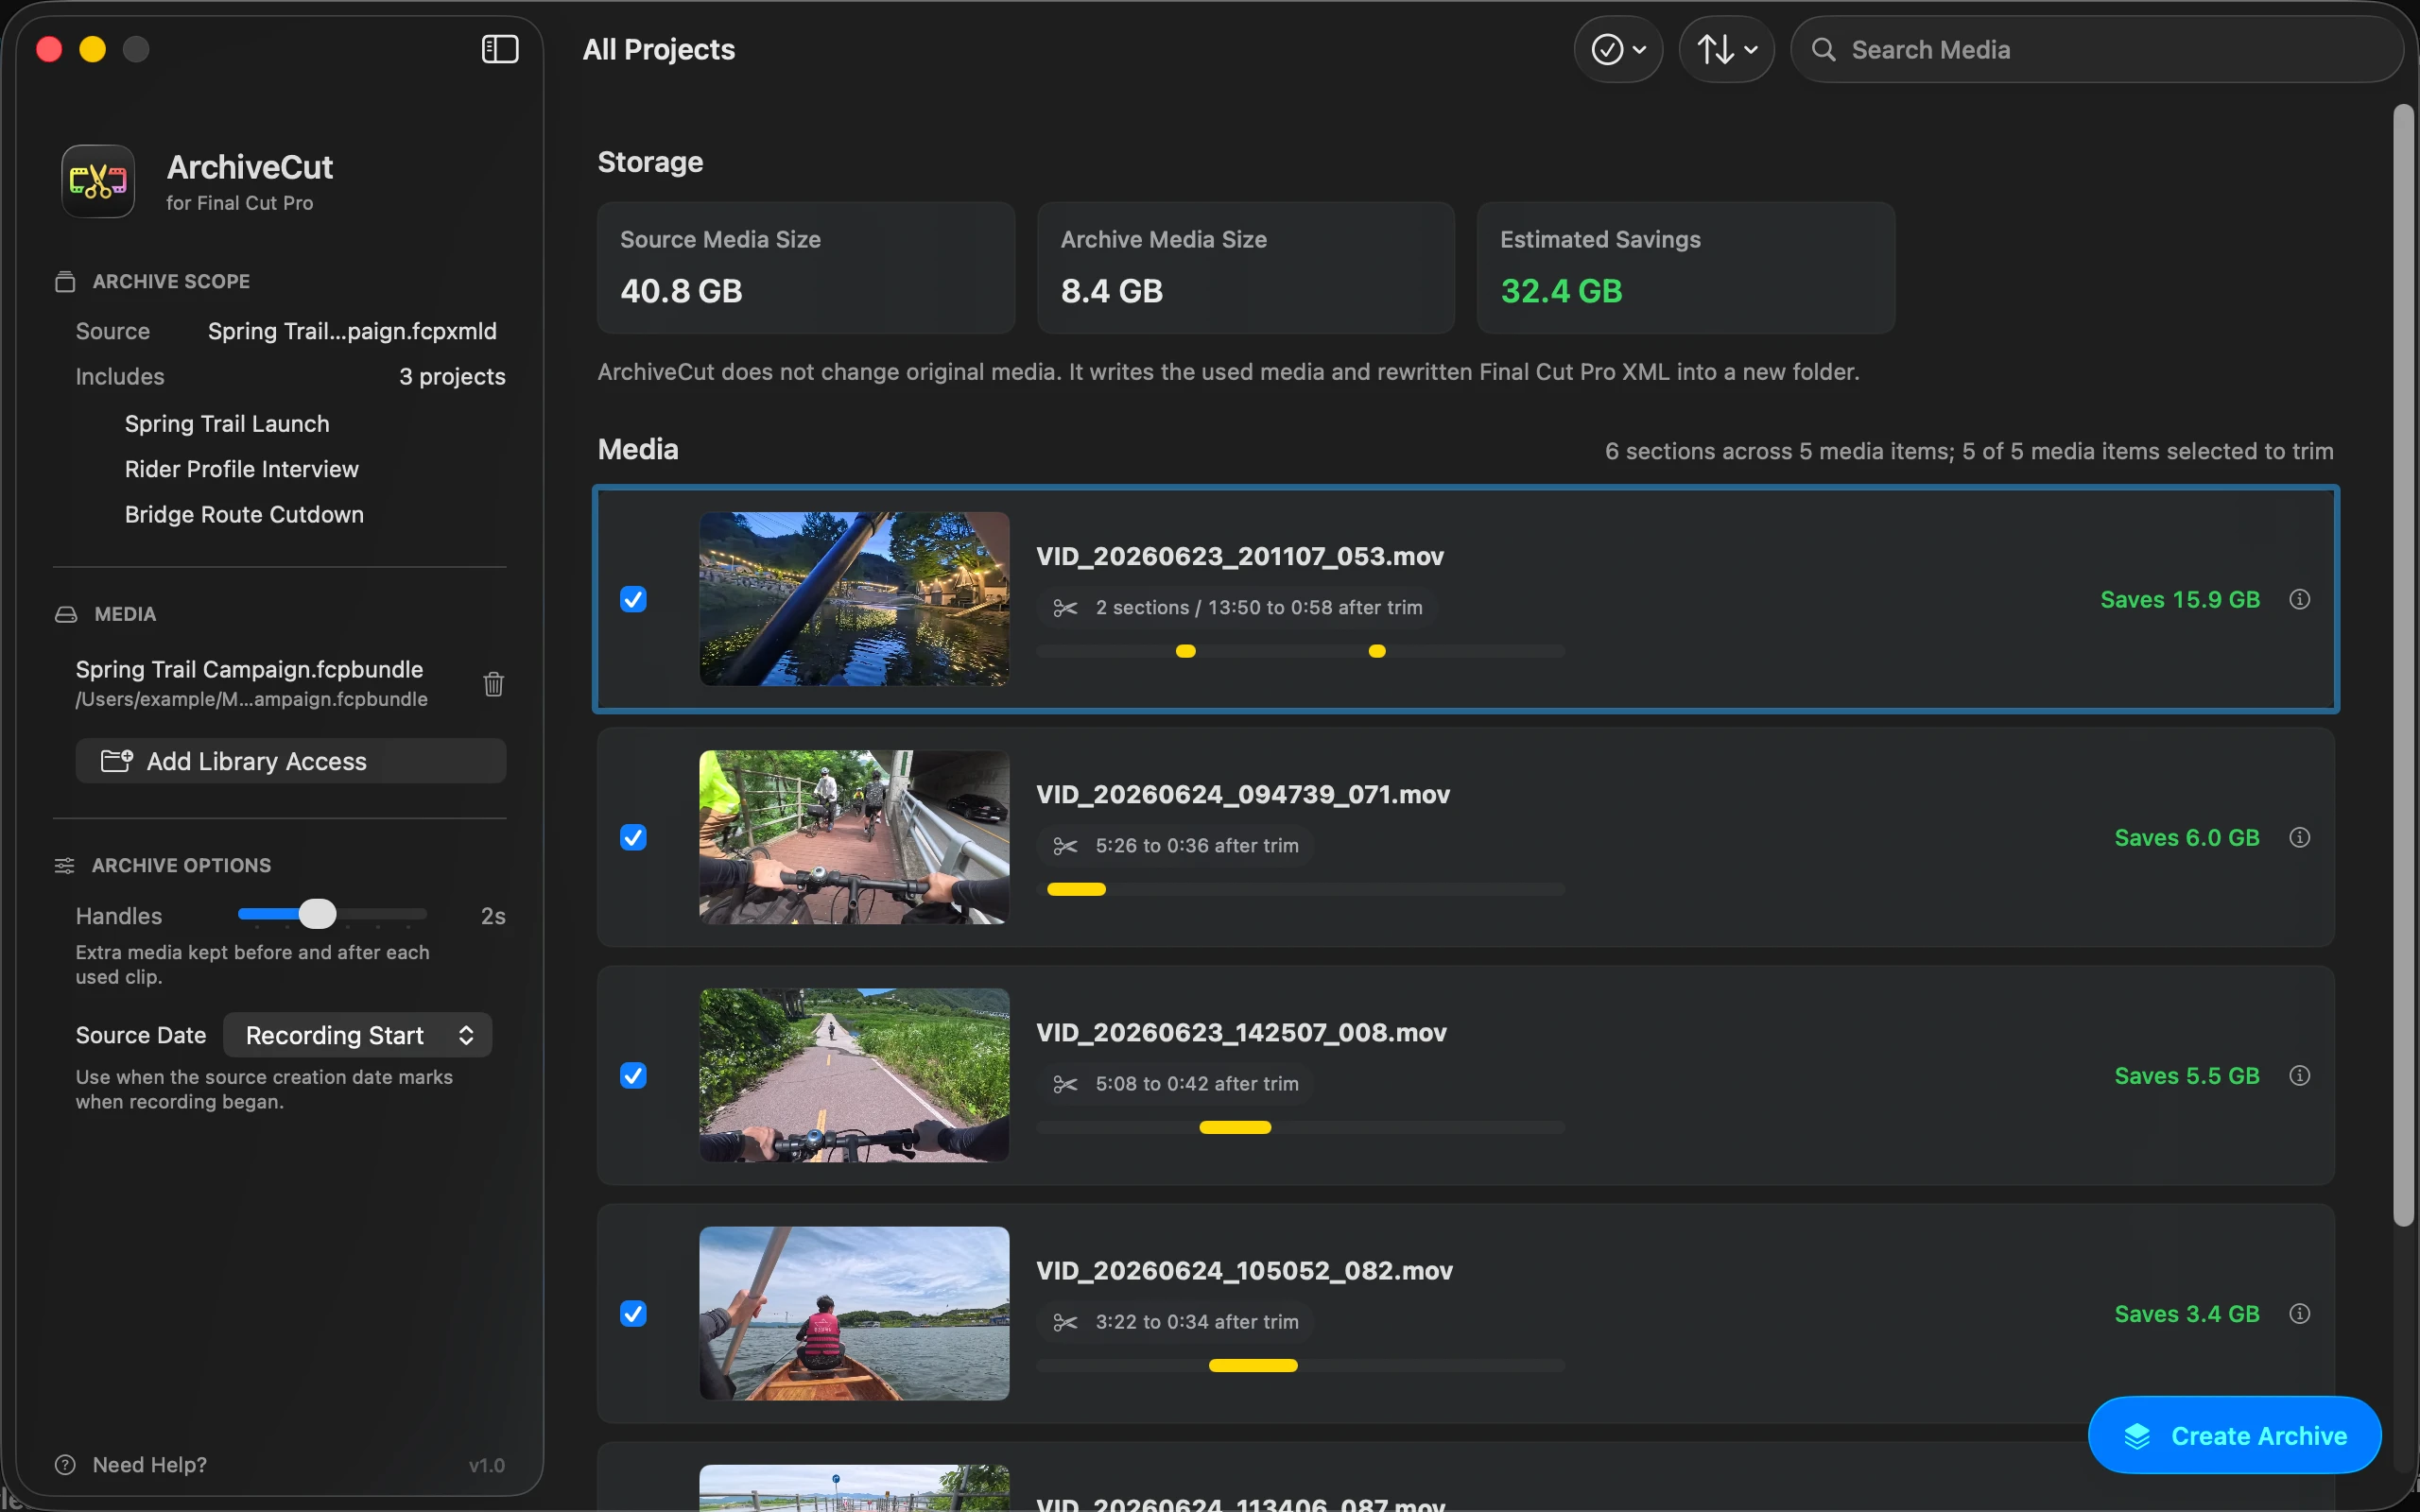
Completely unused clips are left out, and partly used clips are shortened to the ranges the project needs.
Use the trimmed archive
When ArchiveCut finishes, click Open Archive XML. In Final Cut Pro, add the project to an existing archive library or create a new one. The imported project uses the trimmed media in ArchiveCut’s Media folder.
Once the smaller archive replaces the working copy, remove the original event or library from Final Cut Pro. Keep the archive library and ArchiveCut folder together, or consolidate the media into the archive library.